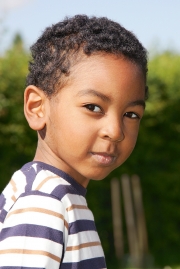
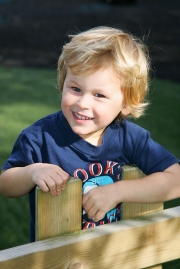
Part 1 of 2 – General tips for taking better pictures of your children.
I’ve been a professional photographer since 1997 and I’ve shot a lot of school, nursery and pre-school pictures in that time. I’d like to think I have a pretty good chance of getting a nice picture of most age groups but some children always amaze me!
When I go in to a nursery I have to build a rapport with the children very quickly so that I have even a chance of getting a natural expression from them and, hopefully, a natural smile. The following are some useful hints and tips for photographing people and some more age specific advice will follow in my next blog post that I hope will help to improve your own photographic skills.
- Never say ‘smile’! The number one rule! You’ll invariably get the infamous ‘camera smile’ – that forced, un-natural expression that doesn’t look anything like a normal smile. If you want someone to smile, do something funny. For children this can be as simple as playing ‘peepo’ from behind the camera or pretending that the flash has made you jump (they don’t realise that you can’t see the flash if you’re behind the camera!) For adults try things like asking them to wriggle their eyebrows, this will often get a quizzical expression followed by a laugh.
- It’s often harder to get older children to smile so you could rope in someone to stand behind you and act the fool. Who’s best in the family at pulling funny faces? Use them.
- Mean and moody photos often work very well especially in B&W or sepia. It can be very hard to get a natural smile from some people so shoot a straight face instead with different lighting. Turn the flash off and stand your subject next to a window. Get them to face the window and then turn their head to look at you. The window will give a lovely soft light that gives very natural shadows.
- Make sure the background is as uncluttered as possible. Focus attention on your subject but if there’s something in the background use it to your advantage. Frame the subject with an arch for example.
- Try not to have things growing out of your subjects head. Street lights and flagpoles don’t look great when sprouting out of a teenager!
- When photographing young children get down to their level, get in to their world. This way they don’t have to tilt their head to look at you which can lead to squinting and some rather odd expressions. You can also then put them at ease by just playing with them for a bit before taking any photos. When they see you’re just having a bit of a play like they are, rather than just another adult trying to get them to smile by saying ‘cheese’, you’ll get much more natural expressions from them. The world at their level also looks very different from what you’re used to so you can use that to your advantage for a unique viewpoint. Get right down on the floor to shoot up at a child and they look very different to how we normally see them – from above.
- If you want to concentrate the photograph on a person use the zoom on the camera to fill the frame with their face/body. (If there isn’t a zoom physically move closer to your subject). This eliminates anything distracting in the background and concentrates the attention on the subject.
- Shoot lots of pictures. One of the great things about digital photography is that we don’t have to pay for processing so the more you shoot the more you can experiment and play with ideas. See what works and remember it and see what doesn’t work and remember not to do it again!
Taking good pictures of people can be hard but just engage with your sitter to put them at ease. Chat away and take pictures at the same time. I often say my job is 20% technical and 80% knowing how to deal with people. It’s hard but so worth it when people who don’t like having their picture taken say they love the shots and better than that say they had fun shooting them.
In my next blog post I’ll carry on the theme with some age specific tips.
All photographs in this post were taken in nurseries and pre-schools.


